Netgear Orbi 870 WiFi 7 Mesh Router Setup Guide- Update for 2026
Working with routers and similar networking devices can become overwhelming at times; especially when you need to deal with technology that’s ever evolving. Devices like Netgear Orbi 870 Setup, and more that come with high speed WiFi 7 connections to your ISP offers three WiFi radios that work simultaneously to deliver superior network performance. If you have upgraded to one of Orbi 870 WiFi 7 Mesh System setup recently, learning about the setup process can come in handy. This blog will walk you through the key steps to setup Netgear Orbi 870 router, so you can get access to the internet in no time.
How to setup Netgear Orbi 870 WiFi router?
The Netgear Orbi 870 router can easily be set up using the Netgear Orbi App and the web-based setup wizard. The steps to complete the setup using these methods are simple and anyone with basic internet knowledge can do it with little guidance.
For the App based setup method though, you’ll need to have the latest version of the app downloaded and installed on your smartphone. You can easily download the same from the App Store or the Play Store and create an Orbi account to proceed with the setup process.
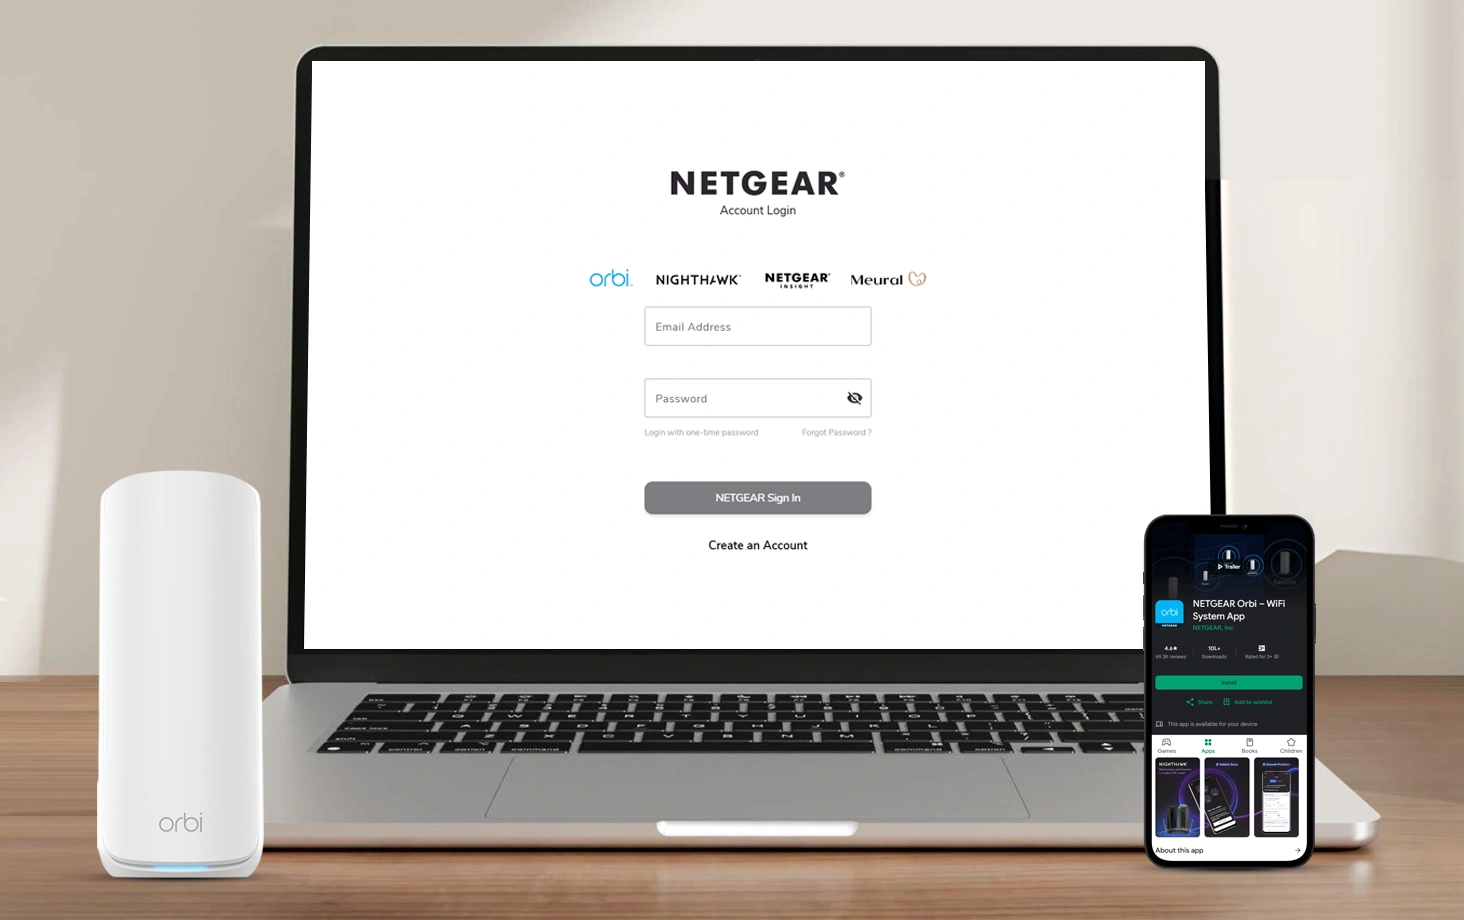
If you wish to continue using the web-based setup wizard, you will need to use either the default web address or the IP address of the device to access the same. The default IP details will come in handy in this case. You can locate these details either on the product label or on the user manual that arrives in the package. Still, here are the default device details for your reference:
Default Web Address: http://orbilogin.com or http://orbilogin.net
Default IP address: 192.168.0.1
Default Username: admin
Default Password: admin
The default username and password might differ based on the router model you are using. Always ensure that you check the product label for the accurate credentials. Once you have confirmed the same, you can proceed with the setup process.
Netgear orbi 870 login configuration
- Unplug the modem and connect it to the Netgear Orbi 870 setup using a LAN cable.
- Next, connect a LAN cable between the Orbi 870 router and the computer you wish to access the login page on. Once connected, the computer will show the ‘Connected’ status in the task bar.
- Connect the router and the modem back to the power source and turn on the same. Now, press the power On/Off button on the device and let the devices boot up.
- If the power LED does not light, ensure that the power adapter is connected properly to the router and the power outlet.
- Once your computer is connected to the router network, you can open a web browser and type in the default web address or IP address in the URL bar. Press Enter and you will be taken to the router’s login page. If you see an error on the page saying this page cannot be opened, click on the Advanced button at the bottom and then select the Proceed with the URL(unsafe) button to continue.
- If you still cannot access the login page, recheck the IP address and the web address you have entered. The correct web address is www.orbilogin.com or orbilogin.net. Alternatively, for new models, you can also use orbilogin.local. The IP address you can use is http://192.168.0.1. Also, ensure that you enter the address in the URL bar and not the browser’s search tab.
Once you are on the orbi login page, enter the default username and password in their respective fields and click on the Login button to go to the main setup wizard and begin with the Netgear orbi 870 setup process.
How to Set Up Orbi WiFi 7 Mesh System?
- Select ‘Internet’ and the internet setup page will display.
- If you have a PPPoE connection, you’ll need a username and password to access the network settings and connect to it.
- Again, select Internet and the type in a domain name in the respective field.
- From the Select an IP address radio button on the screen, select the appropriate option that suits your setup type. You can either select ‘Get Dynamically from ISP’ or ‘Use Static IP Address’ from the options available.
- Repeat this process for the DNS(Domain Name Server) address radio button as well.
- Next, select the router MAC address radio button and make the appropriate selection. Use a default address, use a computer MAC address or use a custom MAC address.
- From the Vendor Class Identifier String field, enter the vendor class identifier string. If there is no VCI string available, you can leave the field blank.
- In the next Client Identifier String field, type in the client identifier(Client ID) string as provided by your ISP. You can leave this field blank if there’s no client ID available.
- Click on the Apply button and the settings will be saved. You can now click on the test button to test the internet connection.
This will complete the Orbi 870 WiFi 7 Mesh System Setup process.
FAQs
What if I encounter Netgear Orbi 870 router not working issue?
If your Netgear Orbi 870 WiFi 7 Mesh Router setup is not working, you can try restarting the same. To reboot, simply press the power ON/Off button on the device and then disconnect the power adapter from the mains power outlet. Allow it to stay like this for about 30 seconds and then power them back on.
Check if the router works now. If it doesn’t you can reset the same to factory default settings and try using it again. Once you have reset the device, you will need to reconfigure the router.
How to resolve the Netgear Orbi 870 router not connecting issue?
If your Netgear orbi 870 router isn’t connecting to the internet, check if the settings are correct by logging in to the Orbi App or by signing in to the web-based setup wizard. If these are fine, you can try resetting the router to factory default settings.
If your router is unable to connect to the computer, check the LAN cable connections and ensure that they are firm and not loose. Check for any damage to the cables and try reconnecting the cables to the devices. Once done, check to see if the router connects.
What are the steps for Netgear Orbi 870 router satellite setup?
Once you have completed the setup process for your Netgear Orbi 870 router, you can use the WPS(WiFi Protected Setup) method to proceed with the satellite setup process. Simply, connect the satellite to a power outlet in the room next to the main router. Press the WPS button on your satellite and you will see the LED on the satellite device start to blink.
Now, head over to the main router and then press the WPS button on it. This should be completed within 2 minutes of pressing the WPS button on your satellite. Allow some time for the devices to connect to each other and you’ll see the lights on the LEDs go solid. This means that the devices have connected to each other.
How can I complete the Netgear Orbi 870 router firmware update process?
Although the firmware updates are downloaded automatically on your router, you can also update them manually. Login to the router’s web management wizard and go to the Admin settings. In the Firmware section, click on Check for Updates. If there are any updates available, you’ll see a prompt for the same. Simply click on Install and the updates will install themselves. The router may reboot during the update process. Make sure you don’t power off or unplug it from the mains.
How to reset Netgear Orbi 870 WiFi router password?
You can reset your Netgear Orbi 870 setup password from the web-based setup wizard. Login to the same and head over to the Device Details section. Under the password field, type in a new password you wish to keep for the device. Save the settings and the changes will take effect. You will need to restart your device for the changes to take effect.
What are the steps to factory reset Orbi 870 satellite?
Your Orbi 870 mesh system setup’s satellite devices can be reset using the RESET button. Locate the same and press and hold the same for about 30 seconds. Once the LEDs on the device start to blink, release the button and allow the device to reboot. Once done, the Orbi router will reboot and the device will shift back to the factory settings. After the device is up and running back again, you can reconfigure the internet settings.
The Final Word
The Netgear Orbi 870 setup is easy to install using the steps we discussed in this blog. You can configure the network settings and customise them as per your requirement easily. If you face issues completing the setup process or encounter any other issues, you can always reach out to the expert team at our end for help.